Sunday, September 26, 2010

progress 9/23


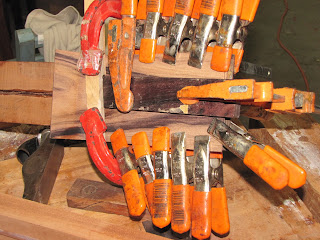
Gluing veneer to the back of the peghead of 000 guitar

gluing veneer to the inside of side where the sound port will be opened.
This reinforcement is necessary to keep that zone of weakness from cracking.


Saturday, September 25, 2010

Neck work 000 guitar

The back of the headstock needs to be thinned to 9/16ths of an inch.  That's so that when the pack veneer is glued in place the total depth will be 5/8 inch.  I use a Wagner Safe-T-Planer chucked up in a drill press.


 Rough thinning done and ready to sand in the volute
Spindle sander with adjustable backing.  This spingle was running.  Impressive how a flash can stop action this well since the spindle was turning pretty fast.

 No flash but no action either.  This shot shows how the spindle sands a curve in the volute

 The veneer that is clamped to the back will have to be bent to match the curved volute.  At present I just do this by hand

Gluing on linings of L-00


Gluing on the first layer of lining for the Koa guitar

Thursday, September 23, 2010

Koa L-00

The sides have ben leveled to fit a domed back that tapers from the back 4.25 inches to the heel, 3.5 inches.
I did this on a powered domed sanding disk that I will show in subsequent posts.


This is going to be the lining for the sides.  Since its solid lining rather than kerfed, it has to be prebent.  I do that over this hot pipe.  It'selectrically heated


Four pieces of lining bent and ready to be glued in.  Since it takes two pieces for each edge of each side, that means I will need a total of ....ah..(lets see 2 edges per side, times 2 sides times 2 pieces per edge)  eight  pieces total.  I'll need to bend 4 more.

ooo guitar side supports

Since the linings are solid wood, without kerfs and consequently very rigid, I inlet the side braces to avoid inducing a zone of weakness as would exist if the side braces stopped when they met the lining.

Here the neck  has been inlet with a truss rod channel (I use a router table for this. sorry no pics of that) On either side of the truss rod channel a rod of carbon fiber has been inlet for stiffness.  The peg head veneer has been glued on to the face of the peg head.  This particular veneer is an old piece of cocobolo.  Its very dark for coco.

Tuesday, September 21, 2010

The koa guitar

Documentation on this build will start pretty much at the beginning and show more of the earlier gritty details than the 000 guitar.  The two will get synchronized eventually.  (perhaps)

This guitar is being built for Lyndsay Wojcik who is an exceptionally talented song writer and performer in the Asheville area.  I encourage everyone to get her CD (I started to write album because I am old school) titled "Local Honey".  Such a great title, I would buy it for that reason alone, but the songs are enchanting, and memorable with lyrics that are fresh and unexpected.  I like it.  Enough groupie talk. On with the build.


Here is my bending form.   I get lots of questions about how the sides are bent.


So, you can see a sort of sandwich of metal slats wood sides and a silicon heating blanket.

A close up of the sandwich.  The metal slats support the wood during the bend and help keep it from cracking.  The silicon blanket gets very hot.  It could ignite the wood if left in contact too long.


Timer switch for the silicon heating blanket.  This helps prevent shop fires.
When the wood is hot, the top screw is tightened down, and that forces the waist of the guitar to pinch in.  The form below the screw limits the bend to the desired shape
This shows the lower bout wrapped around the form and held in place with a spring clamping device.
This is repeated on the front bout and the side is bent into a half guitar shape.   Obviously these steps are repeated for the other half.

Here are the sides clamped in an outside mold.  Starting to look more guitar like already.


This a the heel block that is glued inside the guitar.  It holds the sides together and forms internal support for the heck.  This particular heel block is walnut with maple joint reinforcement.

The other side of the heel block shows rosewood veneer.  The veneer helps reinforce the block grain to prevent cracking.  Its like an exotic piece of plywood.


Gluing in the end and tail blocks.  Takes lots of clamps.
More to come as progress permits
Monday, September 20, 2010

A tale of two guitars

This blog will document what's going on in my guitar shop.

Presently I am making five guitars.  My plan is to document the build for two of these instruments.

 One of the two guitars is a tripple 0 cutaway made of Cocobolo (Dalbergia retusa).  I am building it for a customer who has shoulder problems and wants a guitar designed so that he does not have to hold his arm very far away from his body to clear the lower bout of the instrument.  This guitar will be tapered so that the lower bout will be narrower on the top side and thicker on the bottom side.  Its a wedge shaped guitar and should be very comfortable to hold.  The cocobolo has the look (and tap tone) of a pre-war rosewood guitar.  It will be trimmed with Boxwood bindings and should look elegant and formal.

The other guitar is a smaller instrument whose shape and size was inspired by the old Gibson L-00. It is being made for a local  professional musician who wants something that is easy to play, has good volume and is small and light enough to be comfortable to use for extended sets.  This guitar will be made from an old set of curly Koa that I have had in my wood stash for over 10 years.  Nothing sings like old wood.  I have not decided on the trim and may work this out with the future owner. 
     
If you have not heard a CD titled "Local Honey" I certainly do recommend it.  Great original sound.  This guitar will hopefully be used with some regularity in this talented performer's hands.

Check out my web page at http://www.kinnairdguitars.com/Home.html

Here is the 000 guitar;s sides bent, looking kind of rough, with blocks installed.

here you see the sides have been trimmed so that they are close to where they need to be to recieve the top and back plates.  This picture shows the lining being glued in.  I have bent the lining over heat and will glue in two thin pieces stacked to make a laminate.  The linings are made of Spanish Cedar and should smell great when the box is closed

Here you see the linings are in and they have been shaped to a triangular cross section.  You see the neck block with an L shaped extension that will secure the fingerboard extension, which bolts down to the top making the neck completely removable.

Here you can see the wedge shape.  The guitar is sitting in the same position that it will be held when played.